Your First Part
Ready to make your first part! First click "Create" then on the drop down menu click "Document".
Now you're in your first Document/Project! It might seem a bit overwhelming, but we're going to break it down step by step.
The Viewport
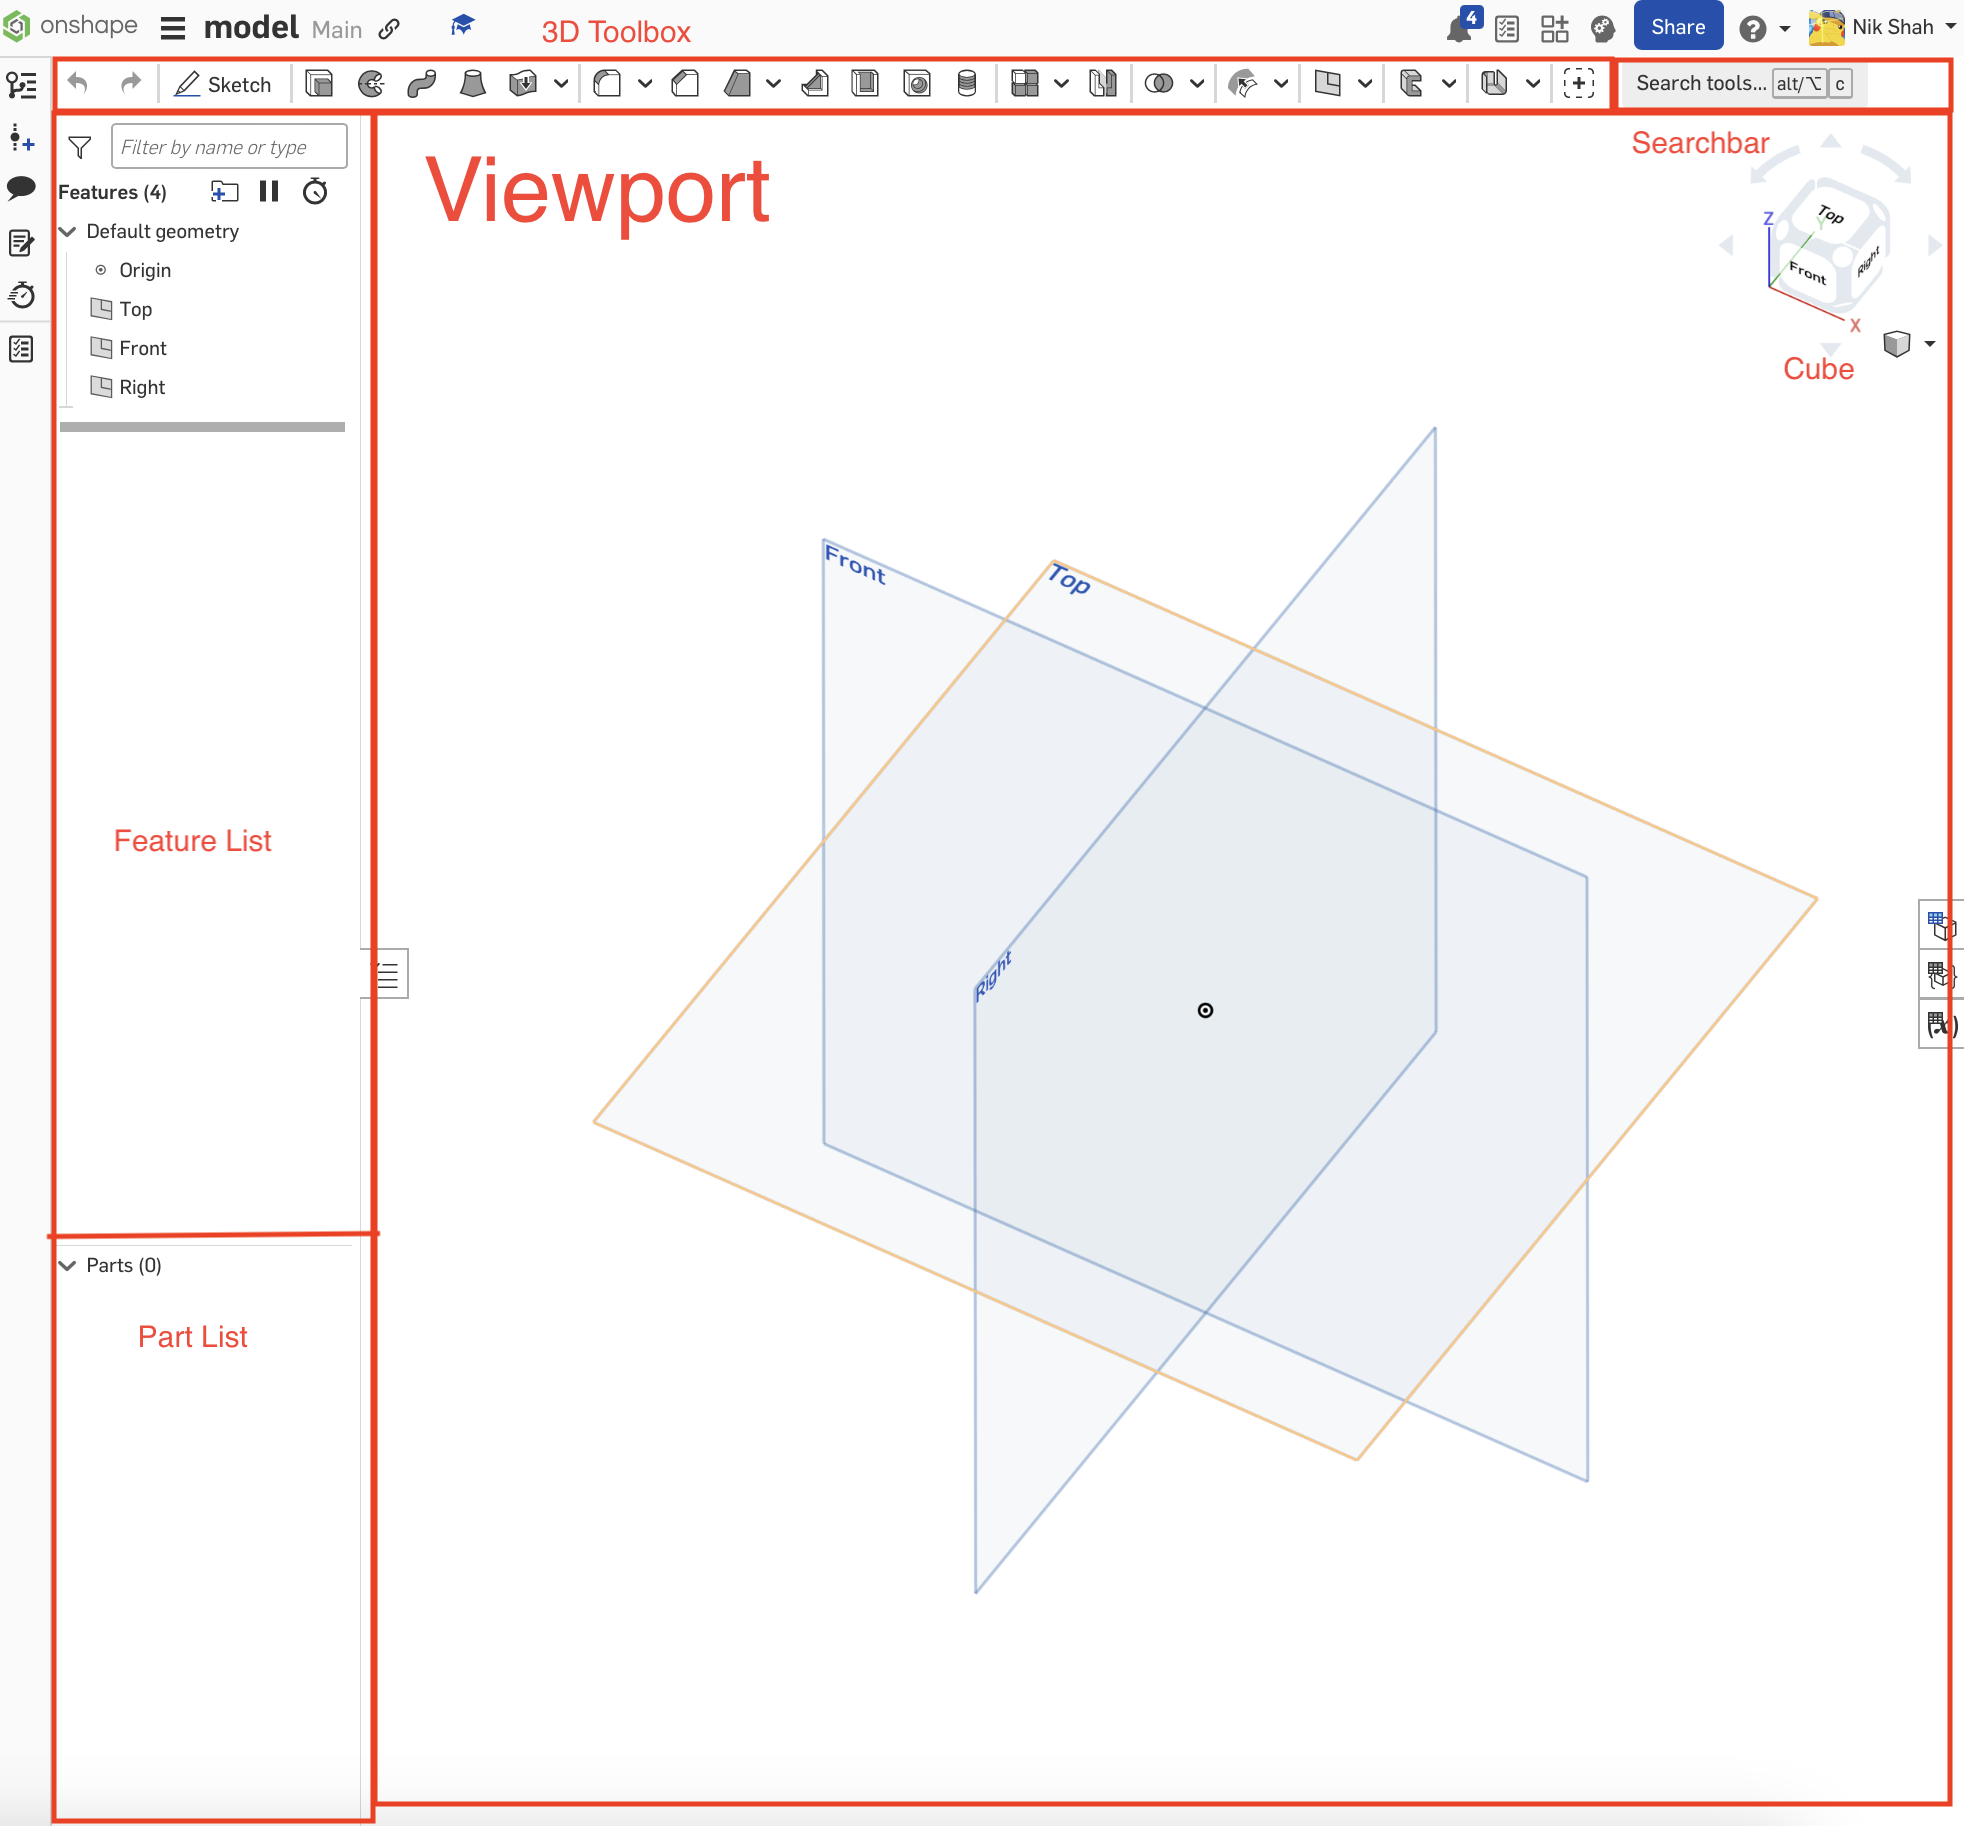
This is the viewport. You'll see 3 planes that give reference to the rest of the project. The cube in the corner allows you to quickly change the plane you're viewing. You can also use right click or two-finger click to change camera angles.
The Feature List
This displays all of your features in your project. It's split into two parts:
- Features — things that modify parts; generally what you use in Onshape
- Parts — their own objects; used to tell if things are connected, export things, or put them into an assembly
The Toolbar
Where you access all your tools. The search bar on the right allows you to search for specific tools. There are two different toolbars: the sketch tools and the 3D tools. You'll need to be fluent with both to model effectively.
Making a Symmetrical Box
Now let's make your first part — a symmetrical box.
- Click "Sketch" on the left side of the 3D toolbox
- Click the top plane, and adjust your view to be looking at it head-on. This swaps your toolbox into the sketch toolbox.
- To make something 3D, you must start with something 2D first! Find the rectangle tool in the sketch toolbox and draw a rectangle of any shape or size. Then press
Esc.
Smart Dimension
Press D to start a smart dimension. This lets you make lines specific lengths — you'll use this tool a lot!
- Your cursor should become a plus sign. Click on one of the sides of the rectangle.
- Drag your cursor off the line — a black arch should follow your cursor.
- Click again to place the dimension, and type in the length you want.
- Press Enter and repeat for a perpendicular side (same length since it's a square).
WIP — More steps coming soon.